

REVIEW · FISHERMAN'S WHARF, PIERS & FERRY BUILDING
An Exciting Scavenger Hunt: Along Fisherman’s Wharf
Fisherman’s Wharf gets way more fun when it’s a game. This self-guided scavenger hunt turns the waterfront into a mission, using the Let’s Roam app for maps, photo challenges, riddles, and leaderboards. You can start whenever you want, take your time, and keep moving at a pace that works for your crew.
I especially like the built-in structure for groups. Each player gets an individual role, with photo prompts to match, so you are not all wandering the same way. My other favorite is that the app helps you get your bearings fast, with maps that keep you from spiraling off course. The one catch to plan for is that some parts may involve extra walking (and a few stops that may charge admission), so you’ll want comfortable shoes and a realistic expectation about what is included.
Key Points I’d Bank On
- Start anytime within the day, so you are not stuck waiting for a set tour time
- Team roles reduce chaos, since each person has a job and photo challenge
- Maps live inside the app, which helps you avoid the common I’m-lost problem
- Photo challenges have options, with roles like Braniac, Photographer, and Mapper
- Attraction fees are not included, so certain indoor stops may cost extra
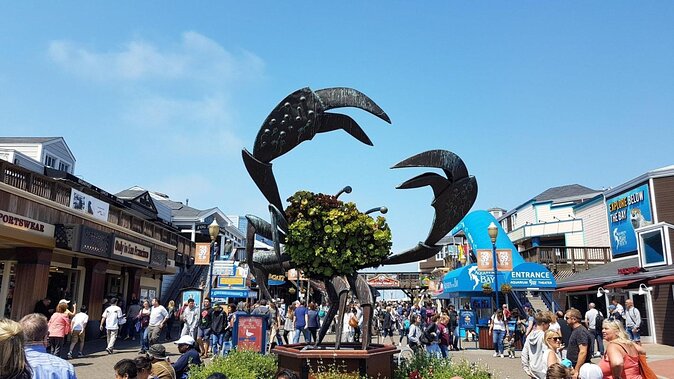
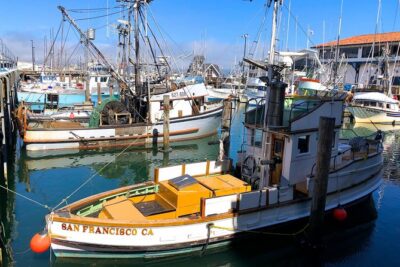
Piers, sea lions and stalls along the northern waterfront




Fisherman’s Wharf Game Plan: Start Anytime, No Tour Guide Timing

This is a self-guided private scavenger hunt that runs about 2 hours for most people. The real win is flexibility. You do not need to show up at a specific start time. You can start your hunt anytime during the operating window, then work through the route in your own rhythm.
That matters in San Francisco, where plans can swing fast. One minute you are fine, the next minute fog rolls in, or you decide you want to linger near the bay. With this setup, you can slow down for photos, speed up when the clues are easy, and take breaks without feeling like you are holding a tour hostage.
You are also not dependent on a guide to keep things moving. That is great if you like independent exploring. Just keep in mind that the hunt relies on your phone, so you’ll want your device charged and ready.
Price and Value: What $12.31 Buys You (and What It Does Not)
At $12.31 per person, the pricing is built around game play, not paid entry to big attractions. You are getting the full self-guided hunt experience, including the app access with maps, riddles, photo challenges, and leaderboards, plus digital copies of your hunt photos.
Here’s why that can be good value: you effectively get a guided experience without a guide fee, and you get a reason to visit a stretch of landmarks you might otherwise treat as just a walk-through. Fisherman’s Wharf can be touristy, but the scavenger format gives it momentum. It’s also friendlier for kids and mixed ages because the tasks pull everyone in.
What it does not include is equally important. Attraction fees are not included, and food and drinks are not included either. So when your route hits places that commonly charge admission, you may need to decide whether you want to pay extra to go inside, or do the clue portion from outside. Your mileage will depend on how the prompts are designed when you arrive.
Getting Set Up: The Let’s Roam App and Your Charged Phone
You’ll use a mobile ticket and the Let’s Roam app for navigation, photo challenges, riddles, and leaderboards. That is the engine of the whole experience. Before you start, read the instructions you get at booking and download the app so you are not troubleshooting on an empty stomach.
Plan for battery life. The hunt depends on your phone, so make sure your device is fully charged. If you think your battery might be weak, bring a power bank. This is the kind of practical detail that can save your whole day.
If you run into an issue, there is phone, email, or chat support listed for help. It is not a live in-person guide, but knowing support exists helps if something goes sideways with the app.
The Route From Pier 43 to Pier 39: Stops That Actually Matter
Your walk loops through a classic Wharf orbit, hitting iconic stops and a few “pause and look” spots. Below is the stop order as you’ll encounter it, with what you should expect and what to watch for.
Solve the next clue somewhere in the city grid



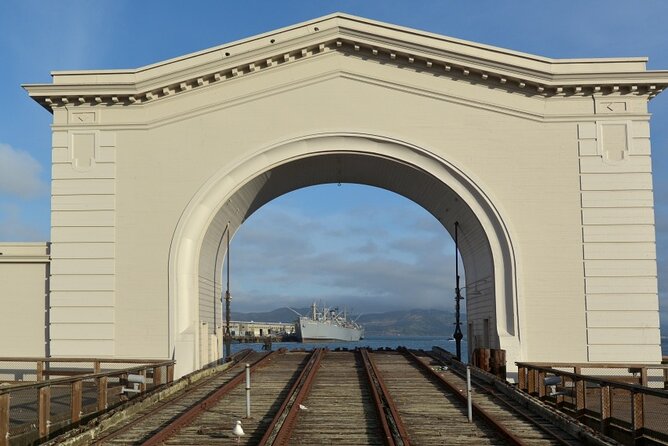
Stop 1: Pier 43 Ferry Arch
This is a strong opener because it gives you a clear landmark to latch onto. It’s also a natural way to start connecting the dots between the Wharf’s working-waterfront roots and the tourist version you see today.
Practical tip: keep your first clue simple. This is where you’ll figure out how fast the app loads prompts and how you’ll handle photo challenges.
Stop 2: The Embarcadero
The Embarcadero section helps you feel like you’re really on a waterfront path. You’ll likely get a break from the densest crowds, while still staying close to the bay.
Drawback to consider: crowds can vary. On busy days, you may need to time photos around pedestrian flow so you are not constantly stepping aside.
Stop 3: San Francisco Art Institute
An art-focused stop adds a different texture to the hunt. Instead of only chasing ships and souvenir shops, you’re also nudged toward the city’s creative side.
What to watch for: depending on the day and access, you might be doing more “spot and photograph” than walking deep inside.
Stop 4: Coit Tower
Coit Tower is one of those “you can’t miss it” landmarks. Even if you only take a quick look, it gives the route a sense of geography, because it pulls your attention upward.
Practical note: expect some uphill walking in this part of the city. Wear shoes you trust. If you’re traveling with kids, build in a slower pace here.
Stop 5: Ghirardelli Square
This is a turning-point kind of stop. It’s a square with personality, and it’s easy to make it feel like a mini break without abandoning the hunt.
Value angle: if you like mixing playful tasks with a comfort stop, this is where you’ll appreciate it. Even if you do not buy anything, the square is a nice place to regroup as a group.
Stop 6: San Francisco Maritime Museum or Aquatic Park Bathhouse Building
This is a history-and-waterfront stop that fits the theme of seafood and maritime roots. You’ll be close to the bay energy, and it’s a natural place to slow down because the setting makes it easy to look around.
Drawback: maritime attractions and indoor exhibits can have fees. The hunt does not include attraction fees, so treat this as a waypoint for the clue portion unless you decide to pay separately.
Stop 7: Hyde Street Pier
Hyde Street Pier is a strong “this is actually a harbor place” moment. It feels grounded in the Wharf’s working past.
What to watch for: if you want to go further than the outside areas, plan for possible paid entry. Your hunt can still be fun even if you focus on exterior photo prompts.
Stop 8 and Stop 9: Lombard Street (listed twice)
You’ll hit Lombard Street, twice in the itinerary. That sounds repetitive, but it can actually help because it gives you another shot to complete a clue without rushing. Lombard Street is also a visual landmark, so it’s a good place to take photos and confirm you are on track.
Practical tip: this is the type of place where you might get stuck waiting for a clear view. If that happens, switch roles and work on the clue rather than just standing there.
Stop 10 and Stop 11: Ghirardelli Square again, then the Maritime National Historical Park Visitor Center
Returning to Ghirardelli Square can work like a mid-route reset. By the time you come back, you’ll be warmed up to the app format, and you’ll know how quickly your group moves.
The Maritime National Historical Park Visitor Center is another orientation point. Visitor centers often give context, and even if you do not go inside, the location helps you understand why this area matters.
Drawback: like other indoor stops, fees might apply for certain areas. The hunt itself stays self-guided.
Stop 12: Aquatic Park
Aquatic Park is a scenic pause that breaks up the more stop-and-go parts of the route. It’s a good spot to catch your breath, check your map in the app, and keep everyone together.
Practical note: weather can change fast near the water. Dress for wind and cool air, even if the rest of the day looks mild.
Stop 13: Fisherman’s Wharf
This is the main event, the name on the label. You’ll get the full Wharf vibe here, with all the sights you expect, plus the scavenger layer that tells you exactly what to look for.
Why it’s valuable: without a game, Wharf walks can feel like a loop of shops. With the hunt, you have a reason to pay attention to details, not just browse.
Stop 14: Musée Mécanique
This stop adds playful culture. Musée Mécanique is known for old-school attractions, and it fits the theme of doing something with your time, not only looking.
Keep expectations realistic: attraction fees are not included, so if you want to go inside, you’ll pay separately. If the clue can be completed outside, it’s still a fun waypoint.
Stop 15: Madame Tussauds
Another landmark that often comes with admission. This is a good place for quick tasks and photos.
Practical advice: decide early how you’ll handle paid entry. If you want to save money, focus on the exterior and clue completion. If your group loves it, build extra time for entry lines and ticketing.
Stop 16: Angel Island State Park
This one is interesting because it moves the hunt beyond the tightest Wharf cluster. During your hunt, you’ll be prompted to reach the Angel Island State Park stop, so your route likely involves a longer walk or a bit of city navigation.
Do not treat this as a quick hop if you’re on a tight schedule. Check your comfort level, and use the app maps so you understand what the route expects.
Also remember attraction fees are not included, so if any access requires a ticket, you’ll need to handle it yourself.
Stop 17: Pier 39
Pier 39 is an ending-with-energy stop. It’s easy to feel like you’ve hit the final stretch, and it works well as a wrap-up because it’s a familiar Wharf anchor.
Value angle: ending near a place where you can eat or rest is smart. Even if you are not purchasing anything, you’ll likely appreciate an easy finish.
Photo Challenges and Roles: How Competition Works Without Getting Messy
This hunt is set up for group energy. You can work with your team or against them, and each player has an individual role, not just one shared job.
You get to choose roles for photo challenges:
- Braniac
- Photographer
- Mapper
That role system is what keeps the experience from becoming chaotic. When everyone has a task, you’re less likely to end up with one person stuck waiting while others wander off. It also gives kids and teens something concrete to do, which often turns “bored” into “wait, where is the next clue?”
The photo challenges are also fun even if you do not love taking photos. Some prompts encourage simple scene shots or landmark-based framing. You end up with digital copies after the hunt, so you can keep them without hunting through your camera roll later.
One note: the riddles and prompts can be tricky in a good way. If your crew likes a puzzle, you’ll probably enjoy the mental workout. If your crew wants low-brain, no-problem sightseeing, you’ll still have fun, but you might spend longer on the clue steps than expected.
Time Management: Staying on Pace in About Two Hours
Most people plan for around 2 hours, but real life adds friction: walking pace, photos, bathroom breaks, and crowd density. The good news is that the hunt is flexible. You set the pace, and you can take a breather when needed.
Here’s what to do so you finish without stress:
- Keep your phone accessible so you are not constantly unlocking it
- Take a quick group moment after each stop to confirm everyone has the clue and photo task
- Treat Ghirardelli Square and Aquatic Park like natural regroup points
- If you start running behind, switch to faster roles and prioritize clue completion over perfect photos
Weather matters too. The instructions ask you to check the forecast and dress for it. Near water, conditions can shift. Wind, fog, and cool temperatures can make long walks feel harder than you planned.
Who This Works Best For (and Who Might Want Something Else)
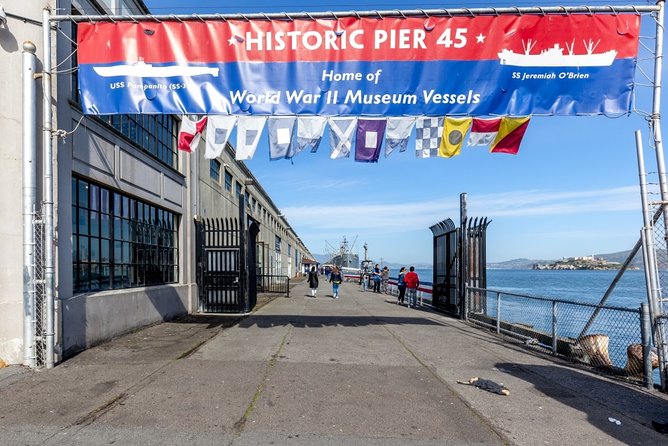
This is a solid choice for groups who like doing things together and want structure without a formal tour guide. It’s also a good match for families, since there is no minimum age and the roles can keep kids engaged.
It can also work well if you are traveling with friends and want something more active than a museum day. You are basically mixing a scavenger game with a Wharf orientation walk.
Best fit:
- Families with kids who enjoy tasks and photos
- Friend groups who want light competition
- First-time visitors who want a route that hits major landmarks without thinking too hard about logistics
You might choose a different format if:
- You want a sit-down guided narrative the whole time
- You hate phone-based navigation
- Your group expects all attractions to be included, because admission fees are not part of the price
Should You Book This Fisherman’s Wharf Hunt?
Yes, if you want a low-cost way to see Fisherman’s Wharf and nearby landmarks with a built-in reason to look closely. At $12.31 per person, the app-driven game play and photo tasks are the core value, and it gives you flexibility you do not get with set-time tours.
I’d book it if your group likes puzzles, photos, and a route that keeps moving. I would also pack it if you want a self-paced activity that works for multiple ages.
Skip or rethink it if you need guaranteed admission to indoor attractions, or if your group struggles with long stretches of walking and constant phone use. In that case, you might enjoy a traditional guided tour more.
FAQ
How long is the scavenger hunt in Fisherman’s Wharf?
It runs for about 2 hours (approx.).
Can we start the hunt at any time?
Yes. You can start whenever you want, with no set time to begin.
What do we need to play?
You’ll use the Let’s Roam app on your smartphone for maps, photo challenges, riddles, and leaderboards. Make sure your phone is fully charged.
Is there a tour guide?
No. It is self-guided, and there is no tour guide included.
Are attraction fees included for stops like museums and indoor attractions?
No. Attraction fees are not included, and food and drinks are also not included.
Where does the hunt start?
It starts at 2350 Taylor St, San Francisco, CA 94133, USA.
Is this activity private for just our group?
Yes. Only your group will participate.
What happens if we cancel?
This experience is non-refundable and cannot be changed for any reason.
More Tour Reviews in San Francisco
- Muir Woods and Sausalito (Return by Bus or Ferry)★ 4.5 · 5,098 reviews
- Big Bus SF: Hop-on Hop-off Tour with 17 Stops and Sunset Option★ 4.0 · 4,539 reviews
- Napa and Sonoma Wine Country Full-Day Tour from San Francisco★ 4.5 · 4,455 reviews
- Small Group Yosemite and Giant Sequoias Day Trip from San Francisco★ 5.0 · 3,671 reviews
- San Francisco: Golden Gate Bay Cruise★ 4.7 · 3,644 reviews
- San Francisco: Hop-On Hop-Off Sightseeing Tour with 17 Stops★ 4.5 · 3,600 reviews
Clues Hidden Across the City
- The Escape Game San Francisco: Epic 60-Minute Adventures Downtown★ 5.0 · 334 reviews
- The Escape Game San Francisco in Fisherman’s Wharf★ 5.0 · 97 reviews
- Prison Break Alcatraz Escape Room in Fisherman’s Wharf★ 5.0 · 96 reviews
- Emperor Norton’s Fantastic San Francisco Time Machine★ 5.0 · 67 reviews
- San Francisco: 7D Interactive Thrill Ride at PIER 39★ 4.7 · 35 reviews
- San Francisco: PIER 39 Flyer, 7D Ride, & Laser Maze Ticket★ 4.4 · 24 reviews
Along the Piers and Wharf
- San Francisco: Alcatraz, Fisherman’s Wharf & Optional Extras★ 4.4 · 663 reviews
- Inside Alcatraz Tour Including Fisherman’s Wharf Lunch Credit★ 4.0 · 505 reviews
- Alcatraz & Fisherman’s Wharf Tour + Cruise & Skystar Options★ 4.5 · 209 reviews
- San Francisco Combo: Ferry Building Food Tour and Alcatraz★ 4.5 · 152 reviews
- The Escape Game San Francisco in Fisherman’s Wharf★ 5.0 · 97 reviews
- Prison Break Alcatraz Escape Room in Fisherman’s Wharf★ 5.0 · 96 reviews
Fresh arrivals for a San Francisco itinerary
- San Francisco: Tour De San Francisco (Electric Bike Tour)
★ 4.7 · 3 reviews - Private Exploration of the Birds of San Francisco
★ 5.0 · 4 reviews - Zion, Bryce, Antelope, Grand Canyon, Las Vegas 6-Day Tour from SF
★ 5.0 · 3 reviews - Private Tour of Yosemite a Two Day Exploration
★ 5.0 · 4 reviews - The Presidio: Main Post to the Golden Gate Bridge
★ 5.0 · 3 reviews - Alcatraz Island Tour with San Francisco Bay Tour
★ 3.5 · 4 reviews
More ways into Fisherman's Wharf, Piers & Ferry Building
 ★ 4.4Alcatraz, Fisherman’s Wharf & Optional ExtrasFrom $99663 reviews
 ★ 4.0Inside Alcatraz Tour Including Fisherman’s Wharf Lunch CreditFrom $89505 reviews
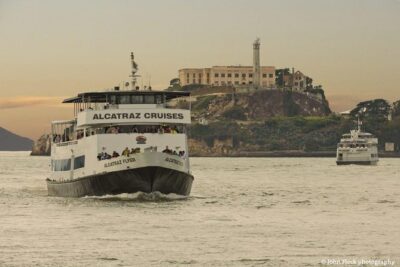 ★ 4.5Alcatraz & Fisherman’s Wharf Tour + Cruise & Skystar OptionsFrom $99209 reviews
 ★ 4.5San Francisco Combo: Ferry Building Food Tour and AlcatrazFrom $181152 reviews
 ★ 5.0The Escape Game San Francisco in Fisherman’s WharfFrom $4597 reviews
 ★ 5.0Prison Break Alcatraz Escape Room in Fisherman’s WharfFrom $4596 reviews
 ★ 5.0Fisherman’s Wharf Walking TourFrom $3993 reviews
 ★ 4.5San Francisco Food Tour: Ferry Building and Ferry Plaza Farmers MarketFrom $9592 reviews
Try another angle on the same itinerary